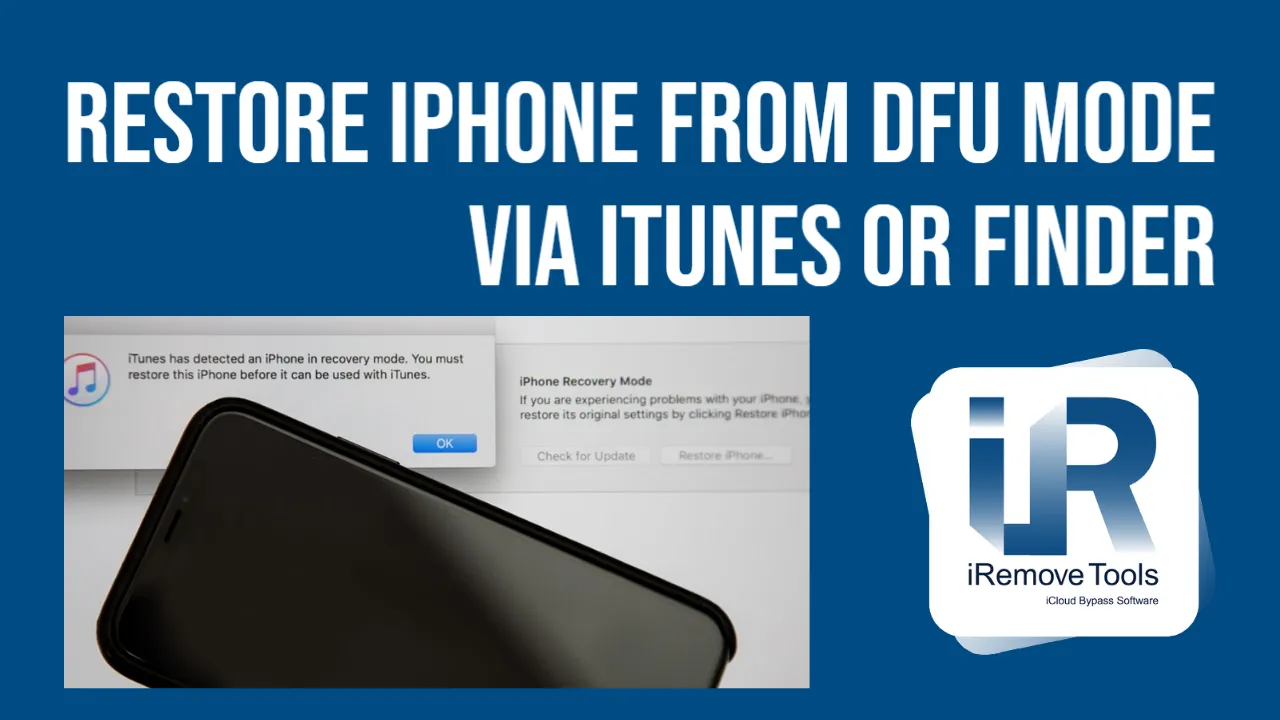
How to Restore iPhone from DFU Mode via iTunes or Finder
You can try an in-depth reset when a regular restore cannot fix your situation and bring your iPhone back to life. The iRemove team has prepared a guide on how to restore the iPhone from DFU mode via iTunes or Finder. Follow it step-by-step to completely erase your smartphone and reload its hardware and software control.
قائمة المصطلحات
- Reasons to Restore iPhone from DFU Mode
- Restore DFU iPhone 8, 8 Plus, X, SE (2nd Gen)
- DFU Restore iPhone 7 and 7 Plus
- استعادة وضع DFU لأجهزة iPhone 6S و 6 و SE (الجيل الأول) والإصدارات السابقة
- كيفية الخروج من وضع DFU على iPhone
Reasons to Restore iPhone from DFU Mode
You can try an in-depth reset when a regular restore cannot fix your situation and bring your iPhone back to life. The iRemove team has prepared a guide on how to restore the iPhone from DFU mode via iTunes or Finder. Follow it step-by-step to completely erase your smartphone and reload its hardware and software control.
Before we explain why you need to use iPhone DFU restore, it is a must to tell you more about this term. DFU stands for Device Firmware Upgrade. It is a special mode that helps restore any iPhone from any possible state.
Through DFU, your BootROM accepts iBSS, and it can accept APTicket if you own an A7+ smartphone. The thing is, your Device Firmware Upgrade is a SecureROM's part. You cannot remove it because it is burned into your iPhone hardware.
Restore DFU iPhone 8, 8 Plus, X, SE (2nd Gen)
Find your USB to Lightning cable and a working computer. Ensure that your Windows PC or Mac running Mojave or an earlier version than macOS 10.14 has the most recent iTunes. If you have a computer with macOS 10.15 (Catalina) or newer, you will use Finder.
- With your iPhone 8, X, or newer version, connect to Mac or PC, launch iTunes or Finder.
- Click once your Volume Up on the smartphone. Then click once your Volume Down button.
- Click-hold the Side button. Do so and watch how the display becomes black.
- With a black screen, you should keep holding your Side button and press-hold the Volume Down button for approximately five seconds.
- Let go of only the Side button but still keep pressing Volume Down. Release it when your smartphone is visible in iTunes or Finder.
- Restore DFU iPhone 8 or newer Apple handset.
DFU Restore iPhone 7 and 7 Plus
Use your computer, Mac Mojave or older Apple computer or Windows PC, a USB to Lightning cable, and the most recent iTunes. Work with Finder instead of iTunes if you have Mac Catalina or a most recent macOS device.
- After your iPhone 7/7 Plus (powered on or off) is connected to a computer, launch iTunes or Finder.
- Press these two buttons at once (hold them too), Power (Sleep/Wake) + Volume Down.
- After counting to eight, release only the Power (Sleep/Wake) button while still pressing the Volume Down.
- When your iTunes or Finder shows the iPhone, you can let go of Volume Down. The phone screen must be black. Only when it is dark, have you successfully entered DFU. If you see the Apple logo on your handset screen or iTunes asks you to connect your smartphone, you should repeat all the steps.
- Once in DFU, restore iPhone 7 or 7 Plus.
استعادة وضع DFU لأجهزة iPhone 6S و 6 و SE (الجيل الأول) والإصدارات السابقة
ستحتاج إلى جهاز كمبيوتر (Mac أو كمبيوتر شخصي) وكابل Lightning to USB وبرنامج iTunes. ستعمل مع جميع أجهزة الكمبيوتر التي تعمل بنظام Windows وأجهزة MacOS Mojave (أو الأقدم). سيستخدم مالكو أجهزة Catalina Macs Finder بدلاً من iTunes (يعمل بشكل مشابه).
- قم بتشغيل iTunes بمجرد توصيل iPhone 6S و 6 و SE (الجيل الأول) بجهاز الكمبيوتر الخاص بك. يرجى ملاحظة أنه يمكن تشغيل جهاز iPhone الخاص بك أو إيقاف تشغيله (لا يهم الآن).
- يجب أن تضغط مع الاستمرار على زرين في وقت واحد، الصفحة الرئيسية + الزر الجانبي (تشغيل/ إيقاف/ قفل). عد إلى ثمانية واترك الزر الجانبي (تشغيل/ إيقاف/ قفل) مع الاستمرار في الضغط على Home.
- حرر زر الصفحة الرئيسية فقط عندما يعرض iTunes (أو Finder) هاتفك الذكي. يجب أن تكون شاشة iPhone سوداء بدون شعارات عندما تدخل في وضع DFU. وبالتالي، إذا رأيت شعارًا أو كانت الشاشة ليست سوداء، فلن تنجح. اتبع التعليمات أعلاه لإصلاح الوضع.
- بعد دخول DFU، قم باستعادة iPhone 6S، SE (الجيل الأول)، 6.
يرجى الملاحظة! لنفترض أن الأمر يستغرق أكثر من 15 دقيقة من iTunes أو Finder لاستعادة جهاز iPhone من وضع DFU، وأن هاتفك الذكي يخرج من ترقية البرنامج الثابت للجهاز نفسه. بعد ذلك، يجب عليك تكرار الخطوات المذكورة أعلاه مرة أخرى. لا بد من الدخول إلى وضع DFU ومحاولة استعادته من نقطة الصفر.
تذكر أن جهاز iPhone الذي يحتوي على مكون مكسور قد لا يكمل استعادة DFU بنجاح في بعض المواقف. إذا كان لديك جهاز تالف، فقد يؤدي الدخول إلى وضع DFU إلى كسره.
كيفية الخروج من وضع DFU على iPhone
هل ترغب في الخروج من الوضع بنفسك؟ سيكون من المفيد إذا فرضت إعادة تشغيل هاتف Apple الذكي باستخدام مجموعات الأزرار التالية:
- أجهزة iPhone 8, 8 Plus, X: انقر فوق رفع مستوى الصوت، ثم انقر فوق خفض مستوى الصوت، ثم انقر مع الاستمرار فوق الجانب في انتظار إعادة تشغيل الهاتف؟
- أجهزة iPhone 7, 7 Plus: اضغط مع الاستمرار على زرين، الطاقة (السكون/ الاستيقاظ) + خفض مستوى الصوت، حتى يتم إعادة تشغيل هاتفك المحمول؛
- أجهزة iPhone 6S, 6, SE: اضغط مع الاستمرار على أزرار الصفحة الرئيسية + الزر الجانبي (تشغيل/ إيقاف/ قفل) في انتظار إعادة تشغيل جهازك.
ها نحن ذا! يجب أن يعمل هاتفك الذكي كما لو كان جديدًا. من الأفضل شحنه وتفريغه عدة مرات، والسماح له بإعادة المعايرة، وستختفي مشكلات البرامج الخاصة به. نأمل أن تعيد استعادة DFU لجهاز iPhone الخاص بك إلى الحياة وتتيح لك الاستمتاع بعمله الخالي من العيوب.
يشارك:
برنامج فتح iPhone و iPad


برنامج Mac Unlock


![برنامج تجاوز إدارة MacOS عن بُعد [MDM]](/assets/img/banners/find-my-mac-unlock-without-icloud-password.svg)
iRemove أخبار

USBLiter8 BootROM Exploit Explained | A12 & A13 Apple Devices
Learn how the USBLiter8 BootROM exploit works on Apple A12 and A13 devices. Explore SecureROM exploitation, Pwned DFU mode, supported devices, security implications, and research applications.
iCloud Unlock for iPhone 15 Series with iRemove Software
Unlock iCloud on iPhone 15 Series effortlessly with iRemove Software. Learn how to bypass Activation Lock on iPhone 15, 15 Plus, 15 Pro, and 15 Pro Max.
Bypass iCloud and Unlock iPhone 14 with the iRemove Software
Bypass the Activation Lock on any iCloud-locked iPhone 14 series model, including the 14 Plus, 14 Pro, and 14 Pro Max, using iRemove Software!
Bypass iCloud Lock from iPhone XR, XS, and XS Max
Use iRemove Software to Bypass iCloud Activation Lock on any iPhone XR, XS, and XS Max models. The fast and effective iCloud Unlock hardware method.

Bypass iCloud on iPhone 11 Series: 11, 11 Pro and 11 Pro Max
Bypass the iCloud Activation Lock on any iPhone 11 series model, including 11 Pro and 11 Pro Max, using the iRemove Activation Lock Bypass Tool!
Remove - Bypass the Activation Lock on iPhone 12 Series
Unlock the Activation Lock on your iPhone 12, 12 Pro, 12 Pro Max, and 12 Mini quickly and easily with iRemove iCloud Bypass Software.
Unlock iPhone 13 with iRemove Software: Easy iCloud Bypass!
Learn how to bypass iCloud and remove Activation Lock from iPhone 13 series (13 Pro, 13 Pro Max) using iRemove Software. Guaranteed success in 2024!

Bypass iOS 16 iCloud Activation Lock Screen
Best iOS 16 iCloud Bypass solution for iPhone and iPad Devices with Activation Lock
Remove Activation Lock without Previous Owner
All methods to ☆ REMOVE ACTIVATION LOCK WITHOUT PREVIOUS OWNER ☆ Ultimate how to guide for iPhone and other iOS users.

Bypass the Activation Lock on an iPad
Reliable Ways to Bypass the Activation Lock on an iPad without Apple ID Password and Previous Owner
مازلت تبحث عن مساعدة؟
من فضلك لا تقلق. يرجى الاتصال بفريق الدعم لدينا. نحن دائما سعداء لمساعدتكم.
اتصل بفريق الدعم الودود