Jailbreak iOS on Mac PC using Checkra1n via iRemove Software
Ultimate Jailbreak Guide
In this guide you’ll find complete tutorial on how to jailbreak iOS 12 up to iOS 14.8.1. using Checkra1n Jailbreak on Mac PC. Checkra1n Jailbreak supports A5-A11 iPhones and iPads. Please note that Checkm8 Exploit does not support iPhones XS / XR, 11, 11 Pro and 11 Pro Max.
iOS Jailbreak on Mac PC using Checkra1n application via iRemove Software
Checkra1n Jailbreak is already built-in into iRemove Software. No need to download it as a separate software. Complete iRemove Software will check your device once jailbreaking process is finished and you can start using it to have your device iCloud Activation Lock Screen free. Please note, Checkra1n can also be used separately from iRemove Software. All you have to do is downloaded it from the official website and go to step 6. Anyway, we strongly recommend you to use iRemove Software for complete jailbreak on your device and to immediately run activation lock Screen bypass through our software.
Checkra1n officially supports Mac OS. Checkra1n usage on Mac OS is very simple even for unexperienced users. We worked hard to make up a complete step-by-step guide for Mac users to help them with their devices preparation for jailbreaking. Please note, Checkra1n jailbreak supports iOS version from 12 up to 14.8.1. If your Apple device runs on older iOS version, please update it to the last version supported by Checkra1n, which is iOS 14.8.1. iOS for your device can be downloaded from https://ipsw.iremove.tools and installed using iTunes via DFU mode. Make sure to use Signed IPSWs only as Signed IPSW files can be restored via iTunes. Currently, Unsigned IPSWs can’t be restored via iTunes.
What we need:
- Mac with installed macOS;
- Download iRemove Activation Lock Screen Bypass Software
iOS Jailbreak on Windows Using Checkn1x Tool
Step-by-step Guide how to jailbreak iOS 12 up to 14.8.1. with Checkra1n via iRemove Software on Mac PC
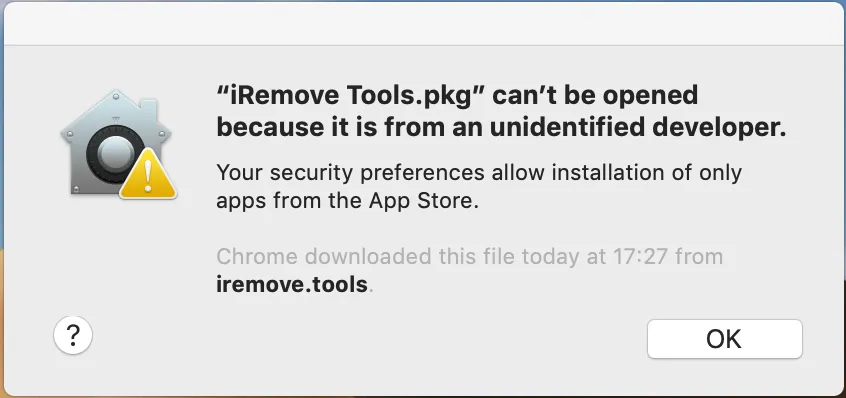
- Download and launch iRemove Software. To do so, click the right mouse button on the app icon and select “Open”. Make sure full permissions are granted to the app and FileVault is disabled in case the app is running with issues while it’s on
![iRemove Software - can't be opened because it is from an unidentified developer step 1]()
-
- Go to the System Preferences of your Mac:
![iRemove Software permissions granted to the app step 1]()
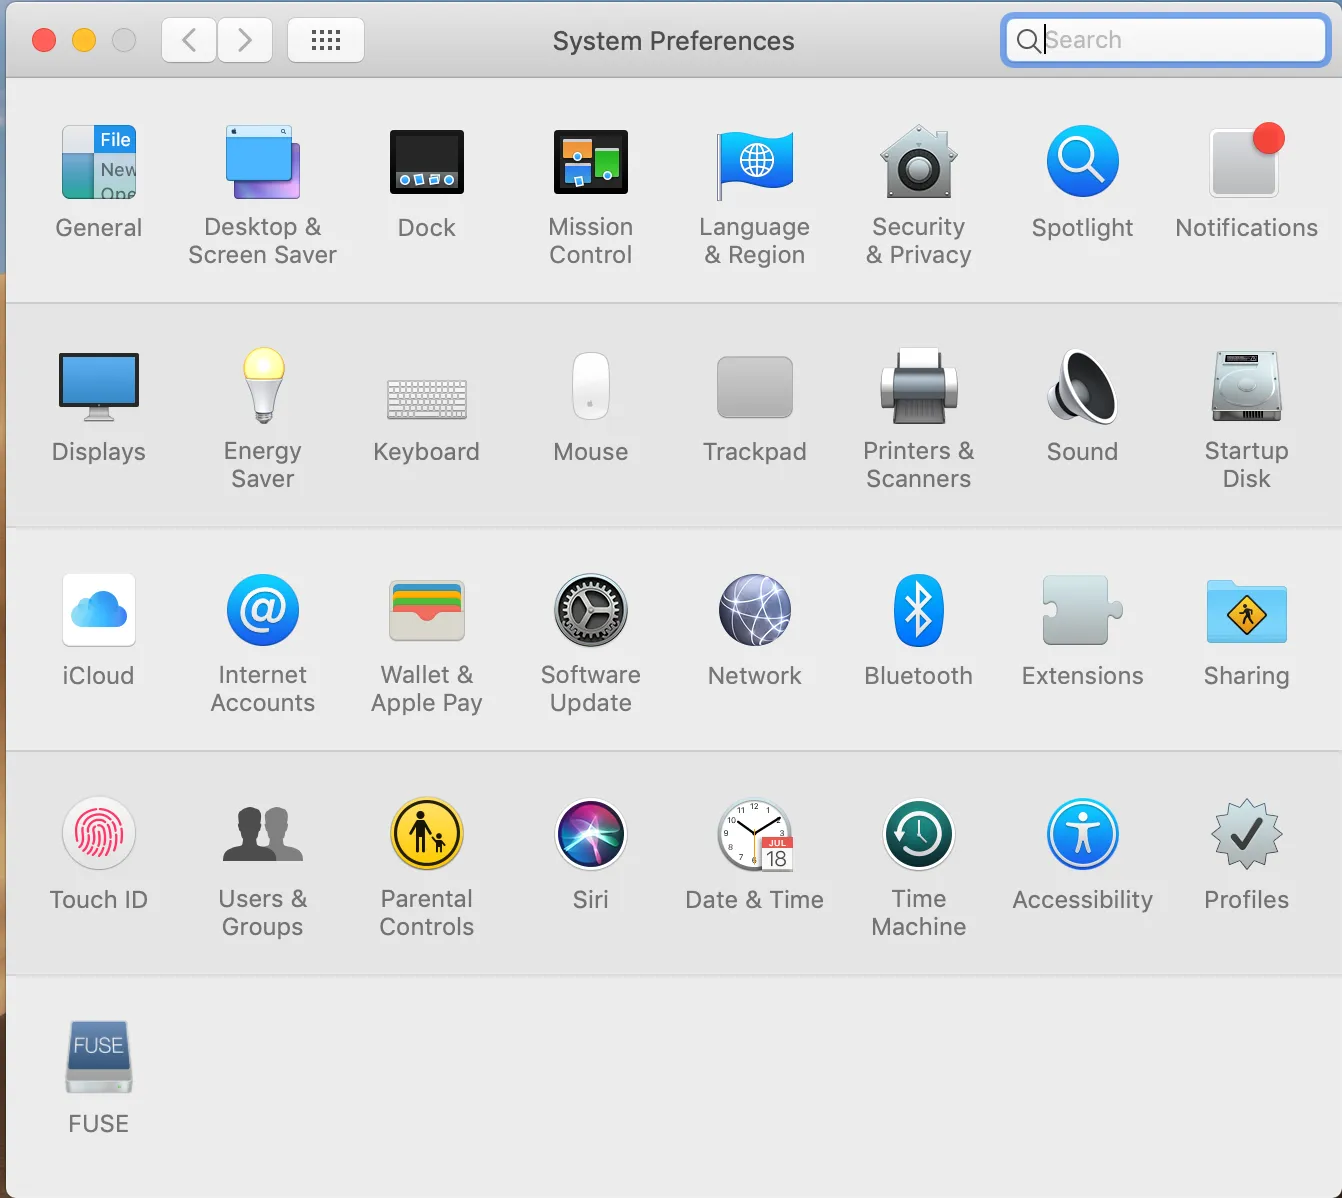
- Open Security and Privacy:
![iRemove Software permissions granted to the app step 2]()
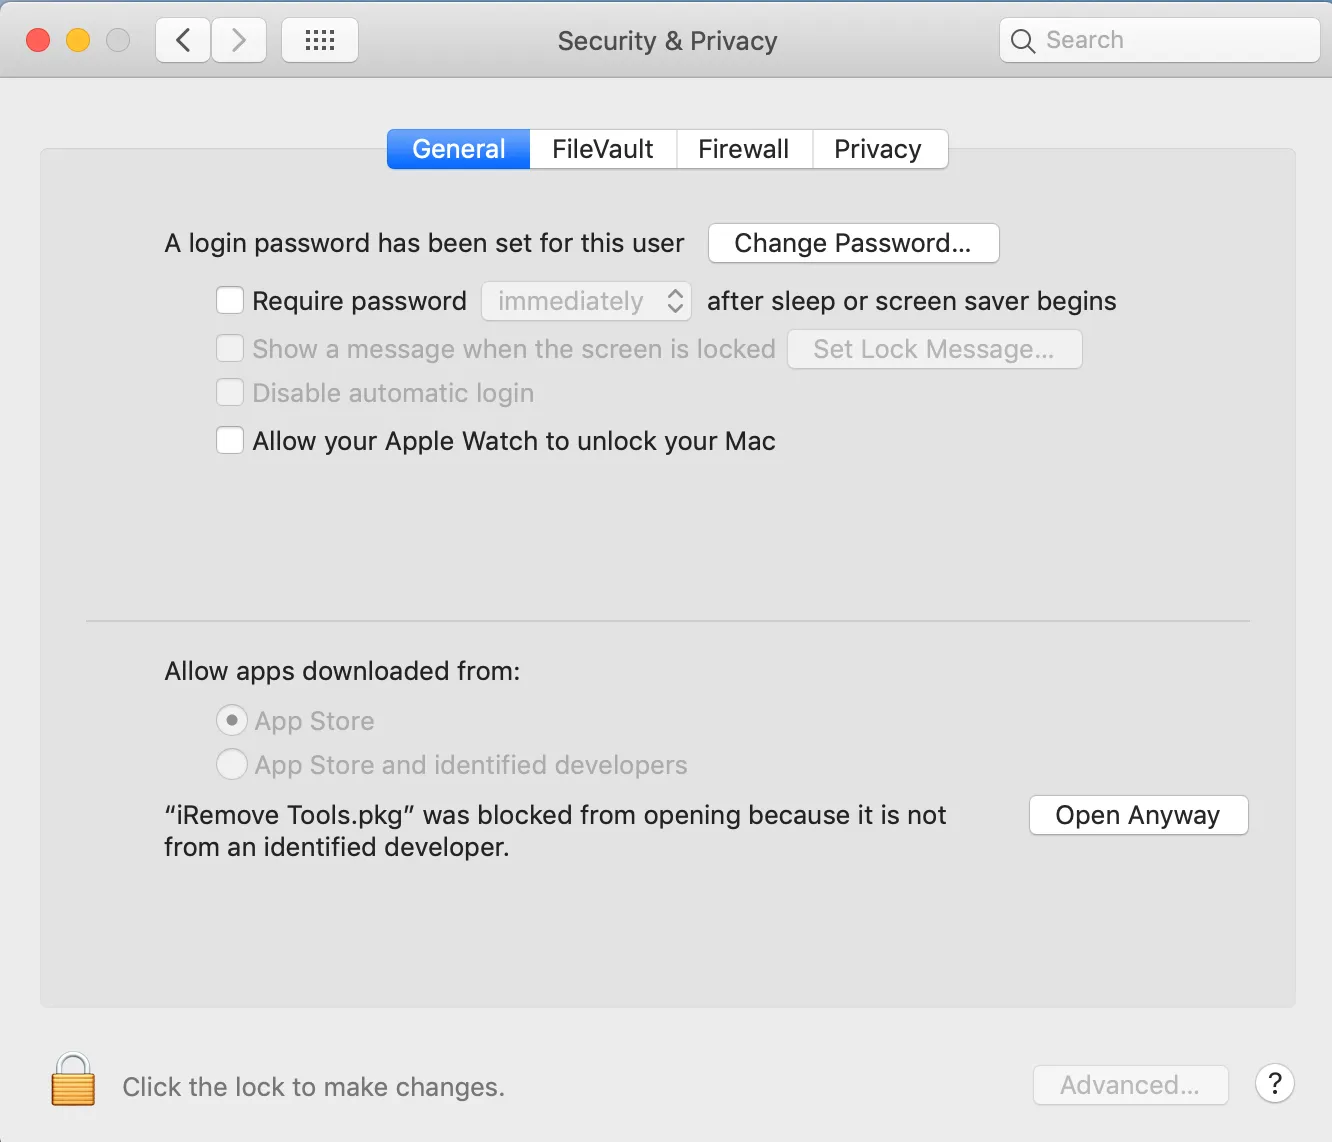
- Open Security and Privacy:
![iRemove Software permissions granted to the app step 3]()
- Go to the System Preferences of your Mac:
- Install iRemove Software.
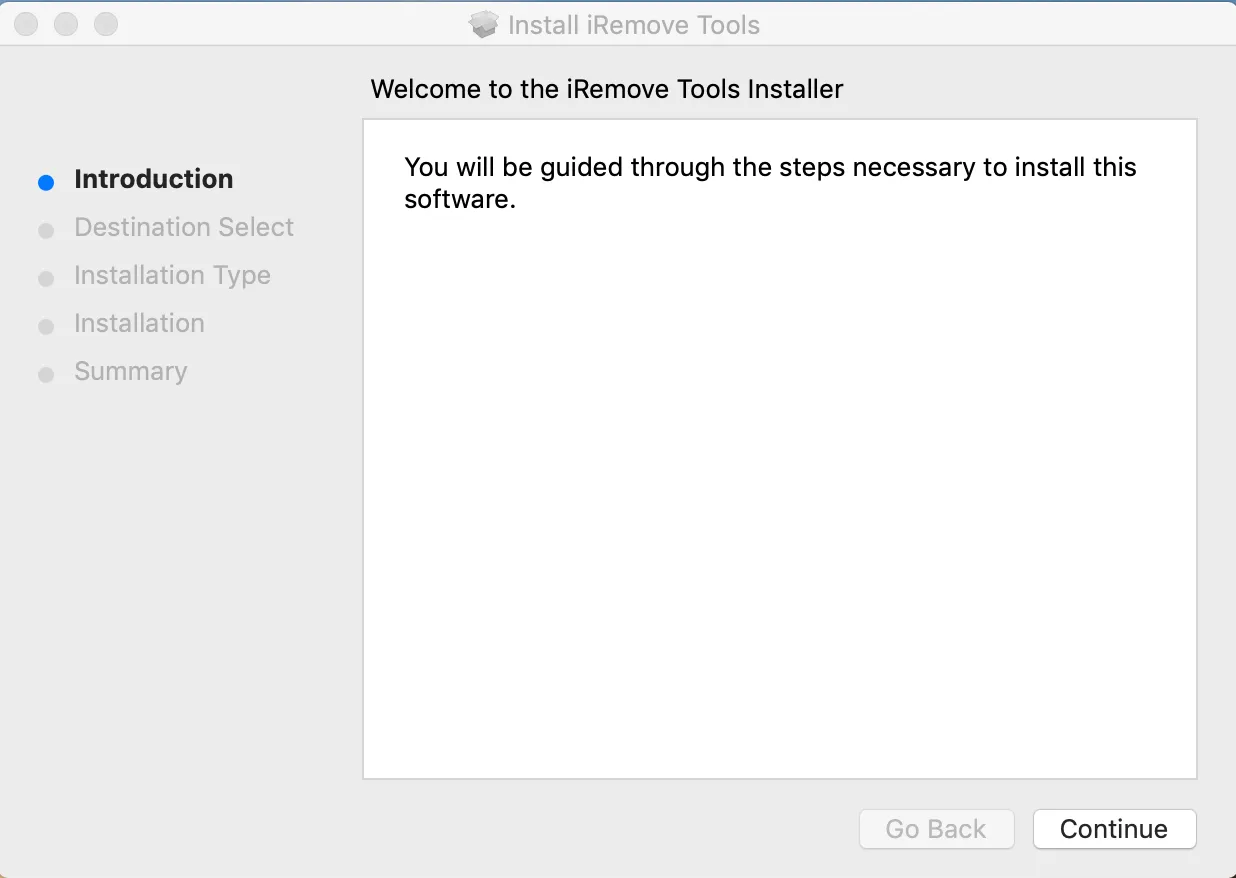
- Click on “Continue” button in Introduction step:
![How to install iRemove Software step 1]()
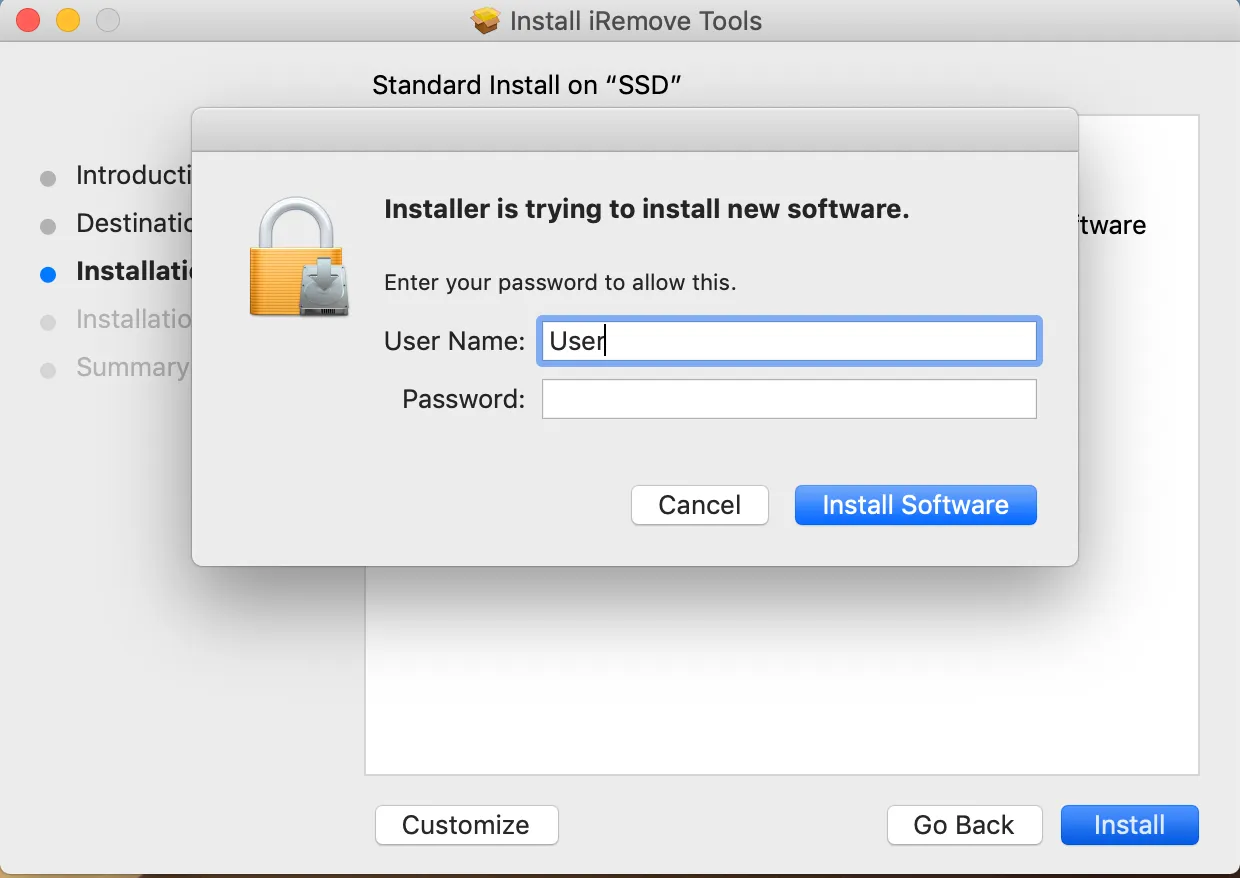
- For installation type, allow the software installation on your Mac by entering your password:
![How to install iRemove Software step 2]()
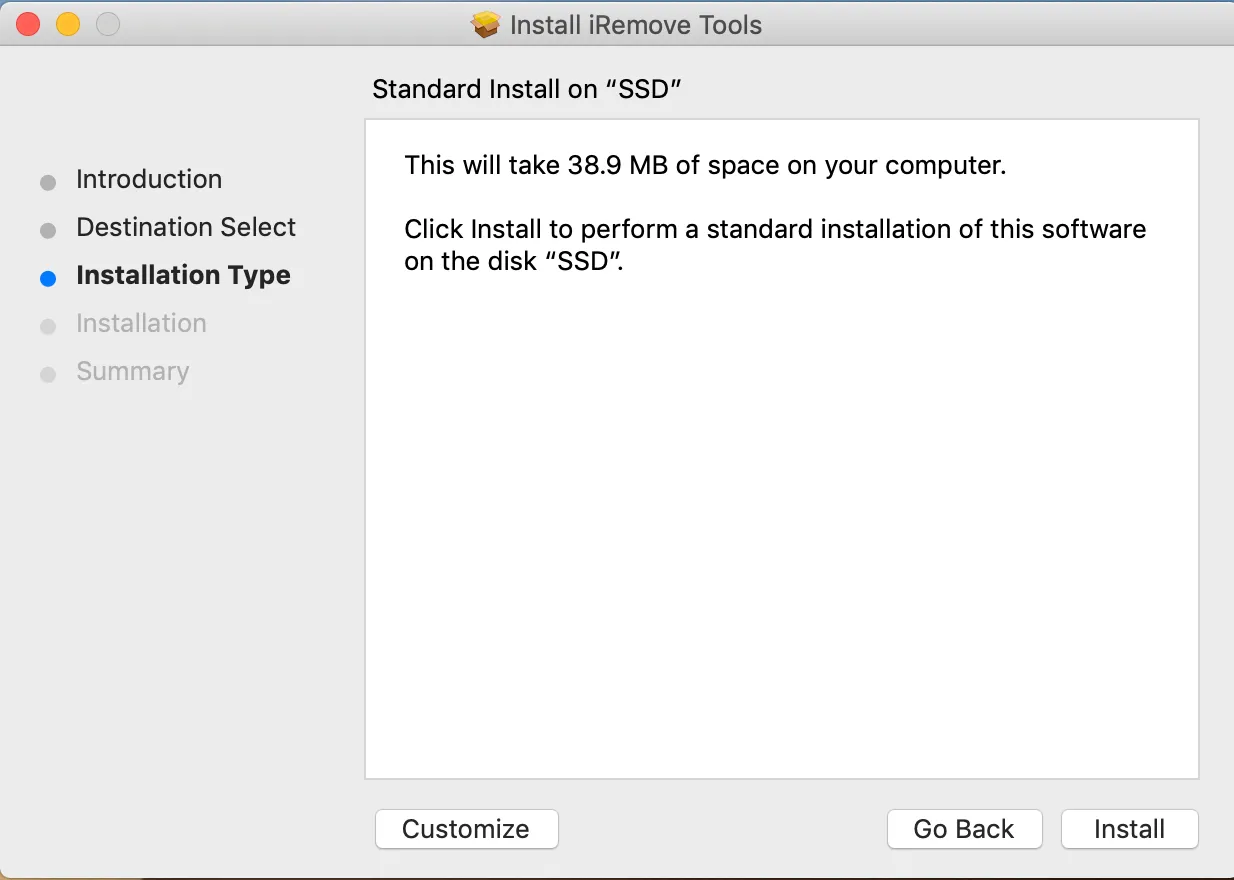
- Install by clicking on “Install” button:
![How to install iRemove Software step 3]()
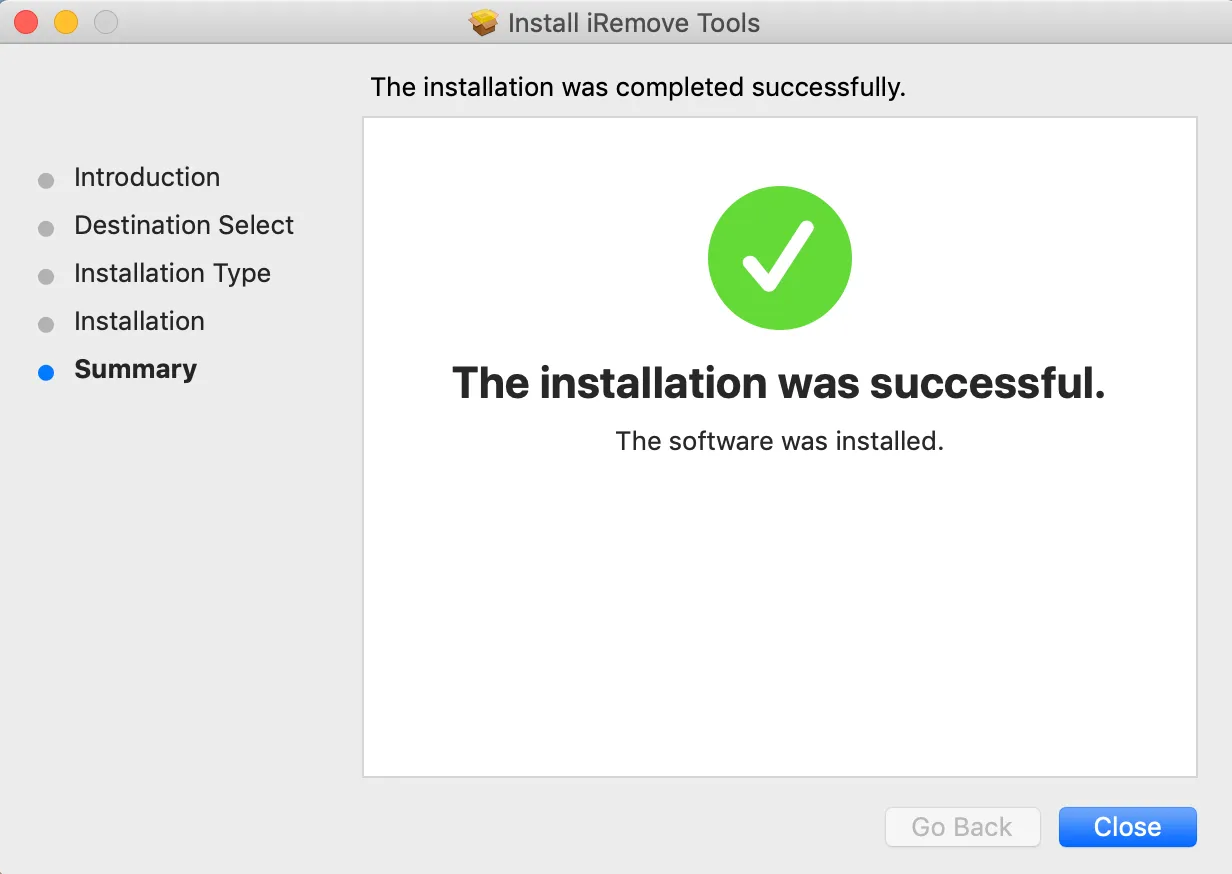
- Summary step - Complete installation by clicking on “Close” button and run iRemove software from app menu:
![How to install iRemove Software step 4]()
- Click on “Continue” button in Introduction step:
- Open iRemove Software. Click on the App’s icon or Launchpad icon in the Dock. If you clicked on Launchpad, click by iRemove Software icon afterwards.
![]()
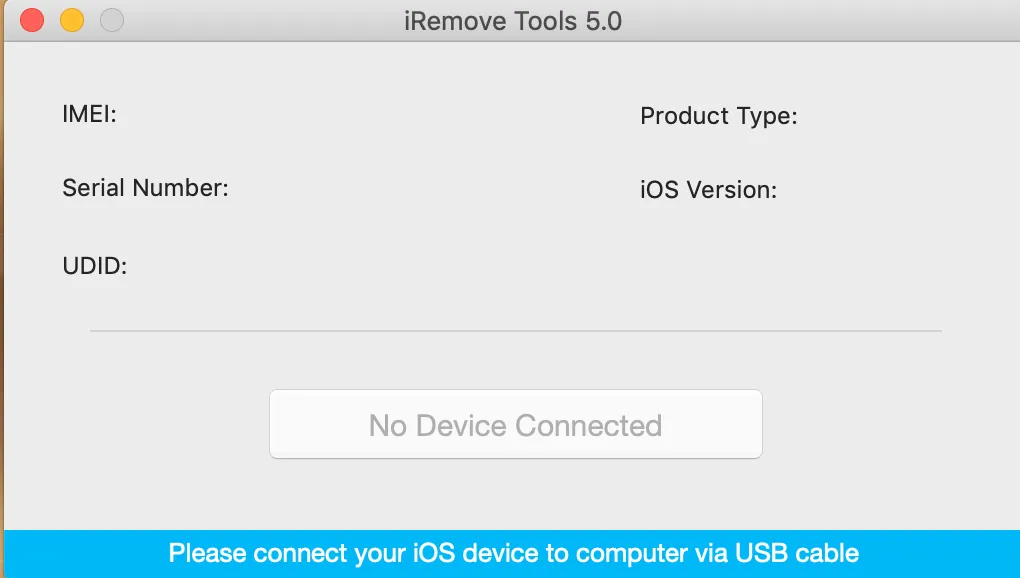
- Connect you iPhone or iPad to Mac PC with USB cable. Your device will be checked once iRemove Software detects it.
- Following message will appear in case your device is supported, but is not jailbroken:
![Run iRemove Software]()
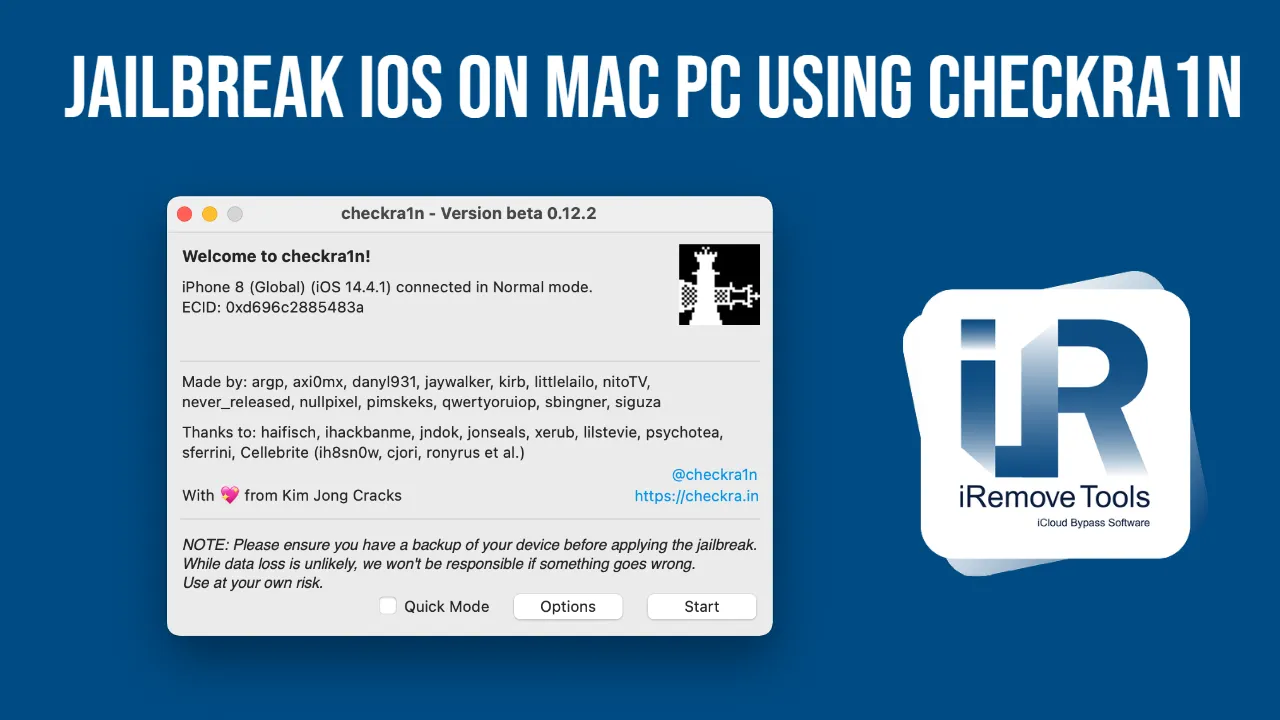
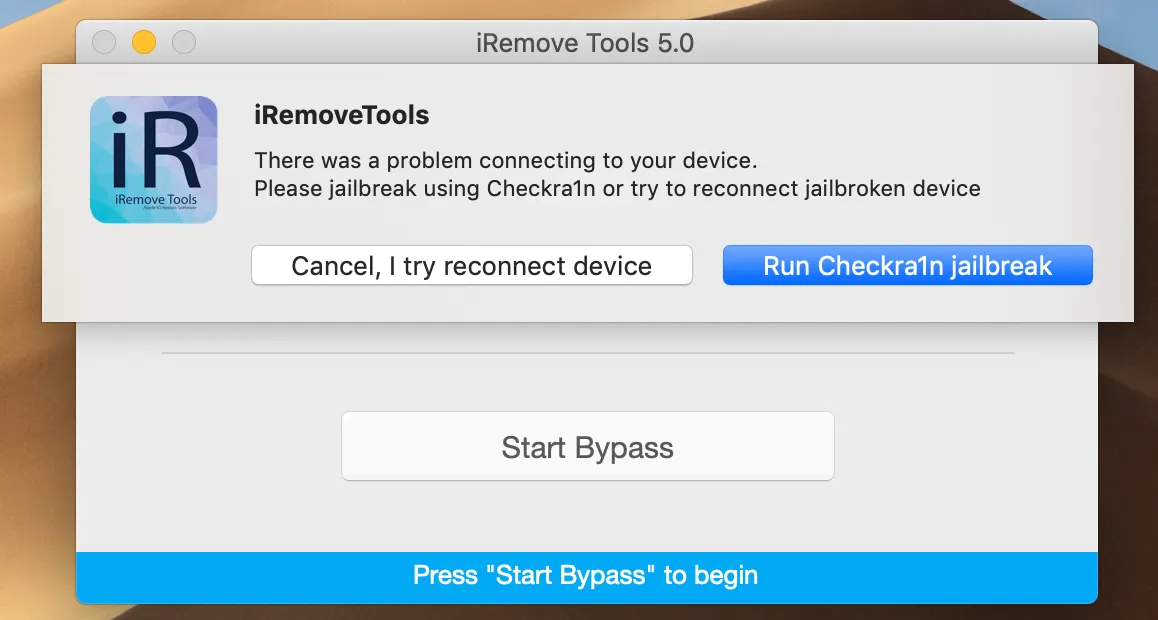
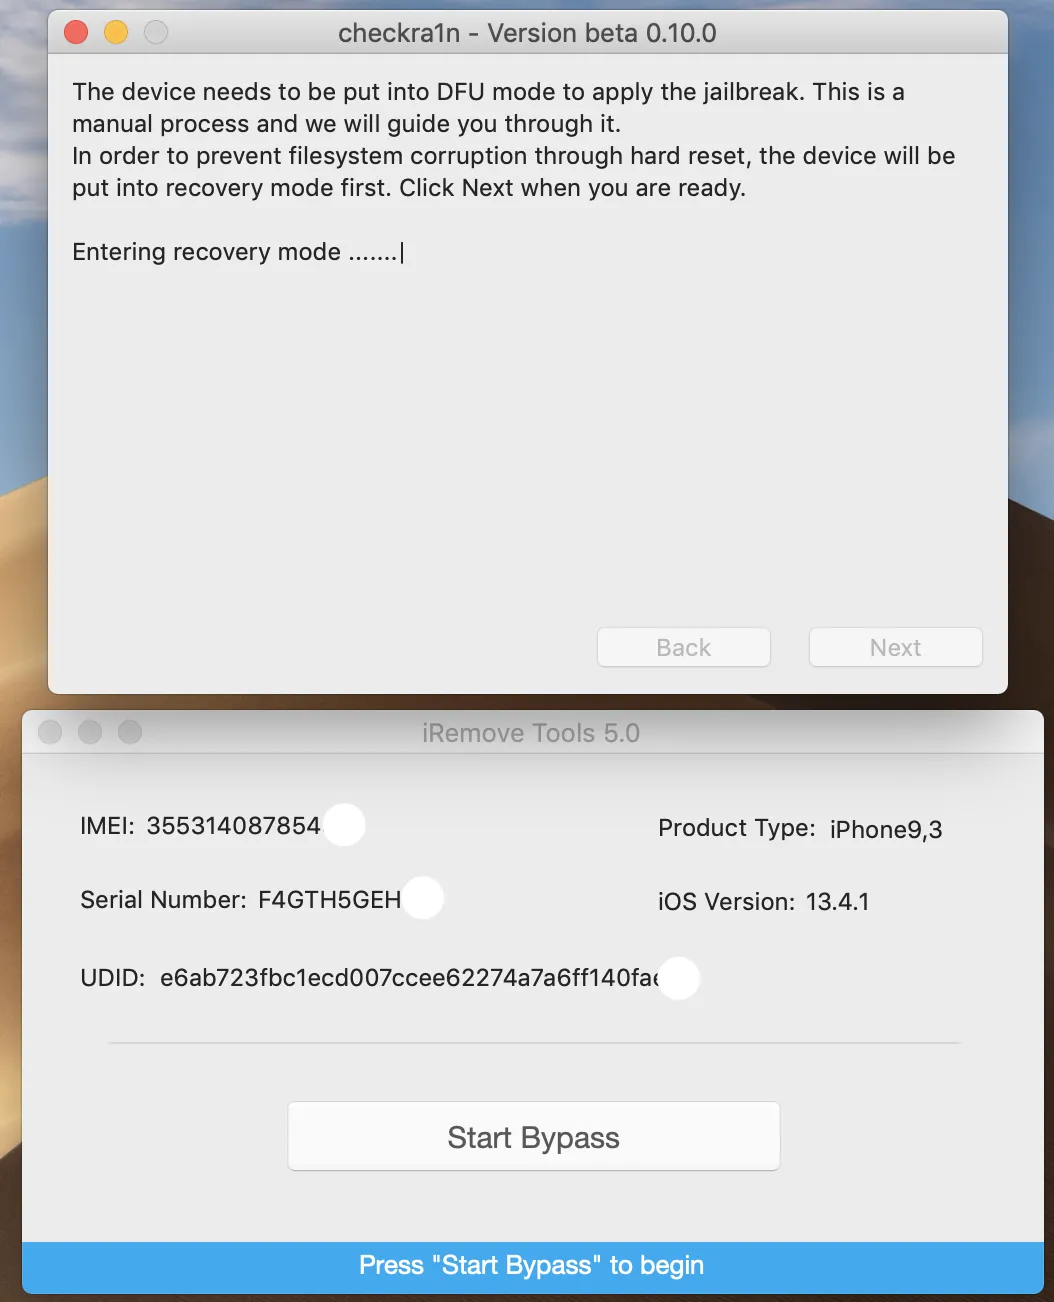
- Click the right mouse button to run Checkra1n. Checkra1n will detect the device connected to Mac PC. Click Start button.
![Checkra1n - jailbreak iOS step 1]()
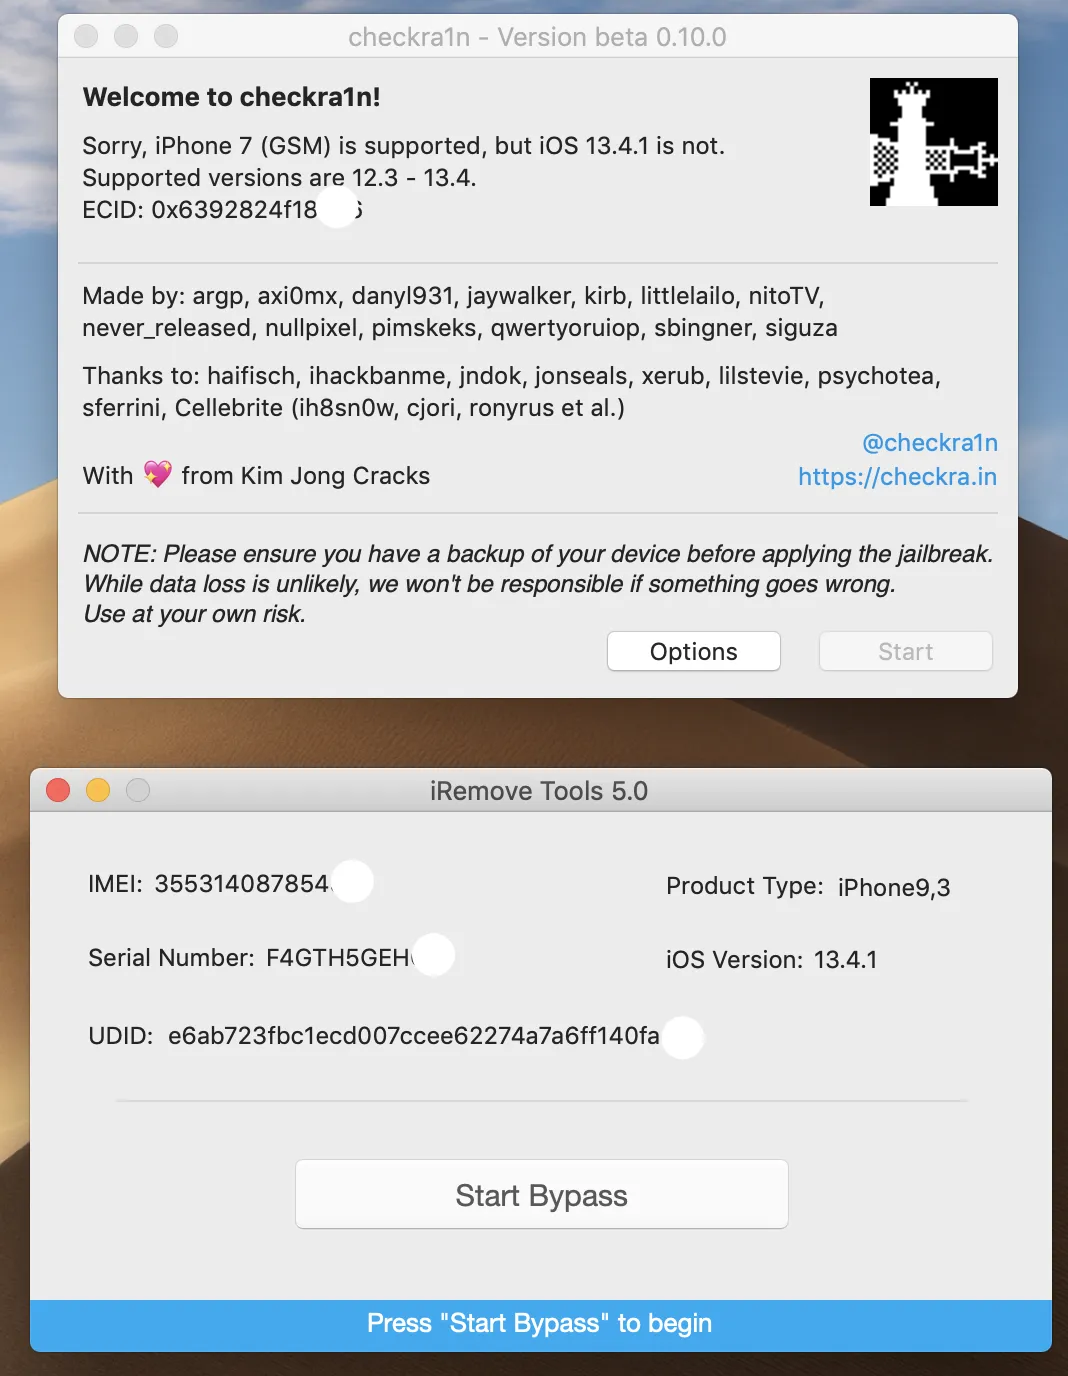
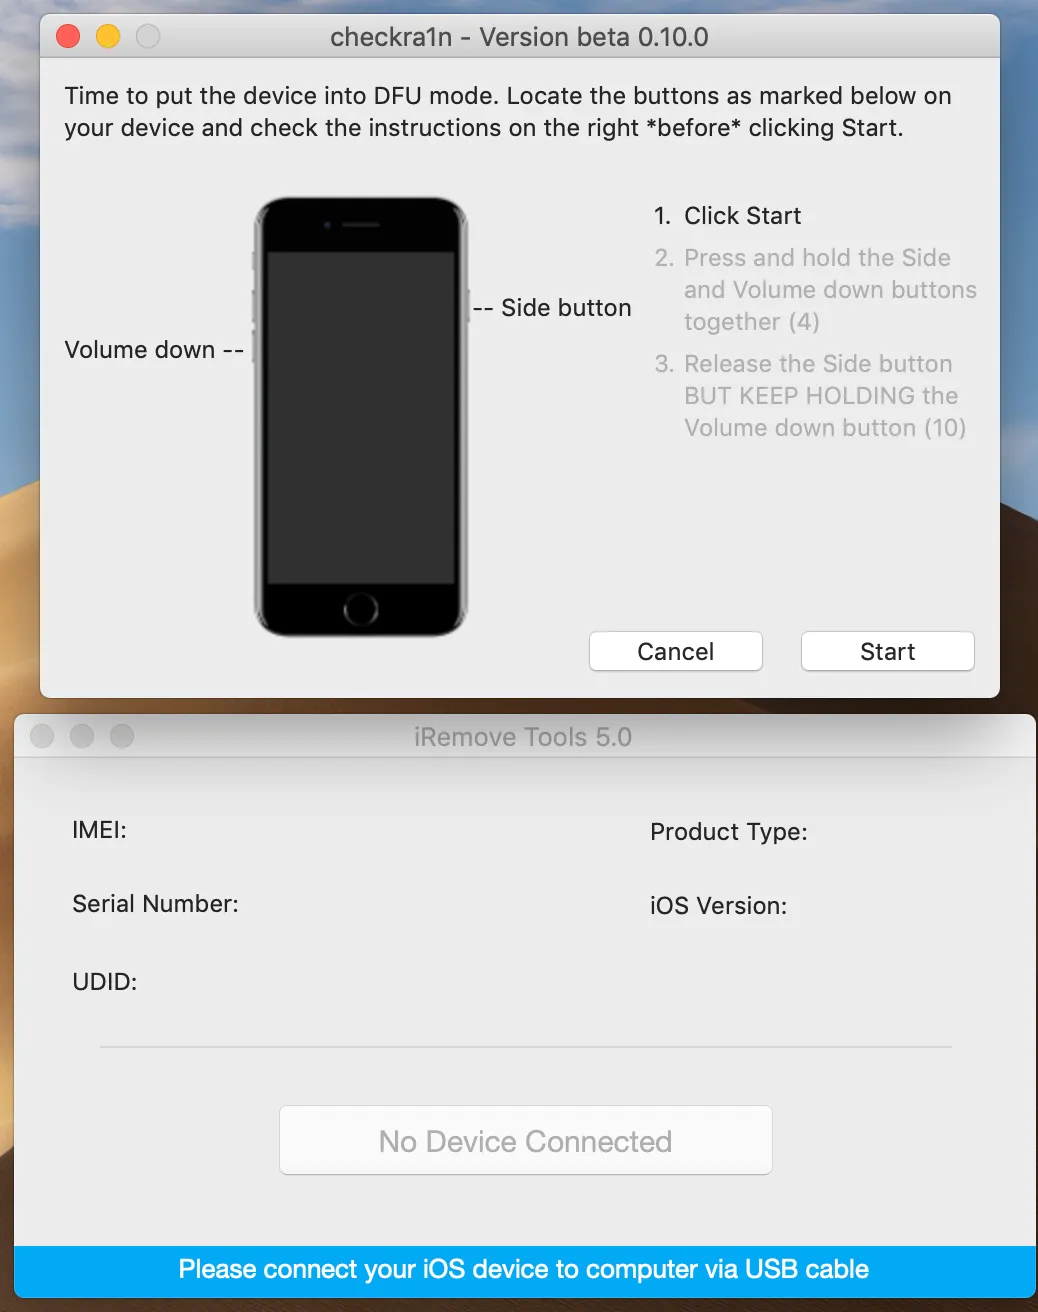
- Next Checkra1n screen will display instructions on putting your device into DFU mode for the purpose of jailbreaking process initiation.
![Checkra1n Jailbreak iOS via iRemove step 1]()
- Please follow the on-screen guide telling you how to put your device into DFU mode. Our own instructions on how to put your device into DFU mode are here for you in case you face any issues with following the on-screen guide.
![Checkra1n Jailbreak iOS via iRemove step 2]()
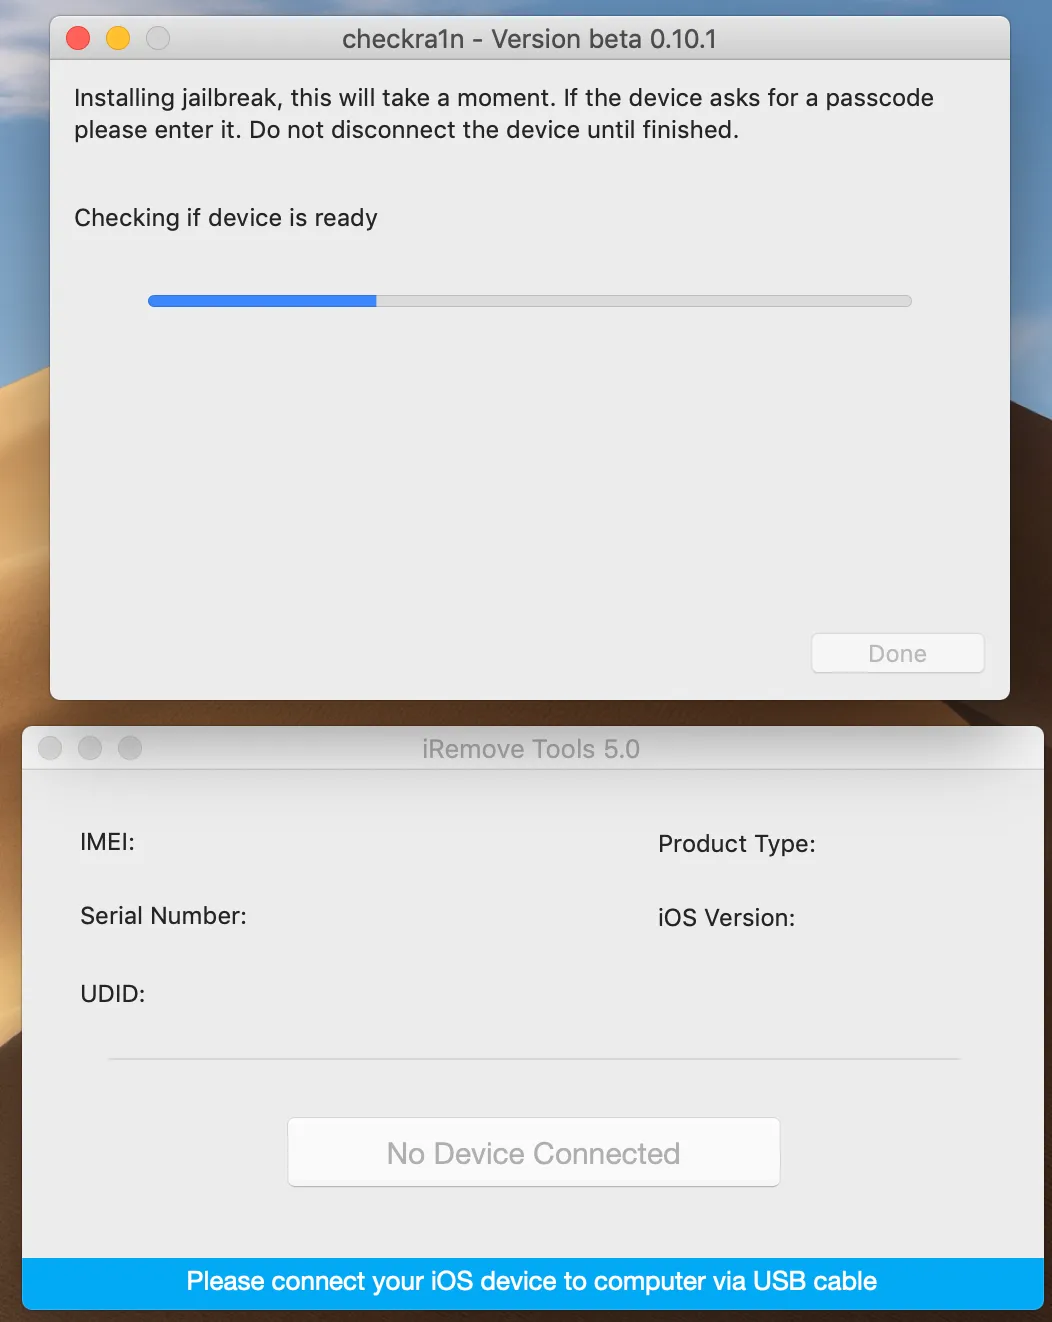
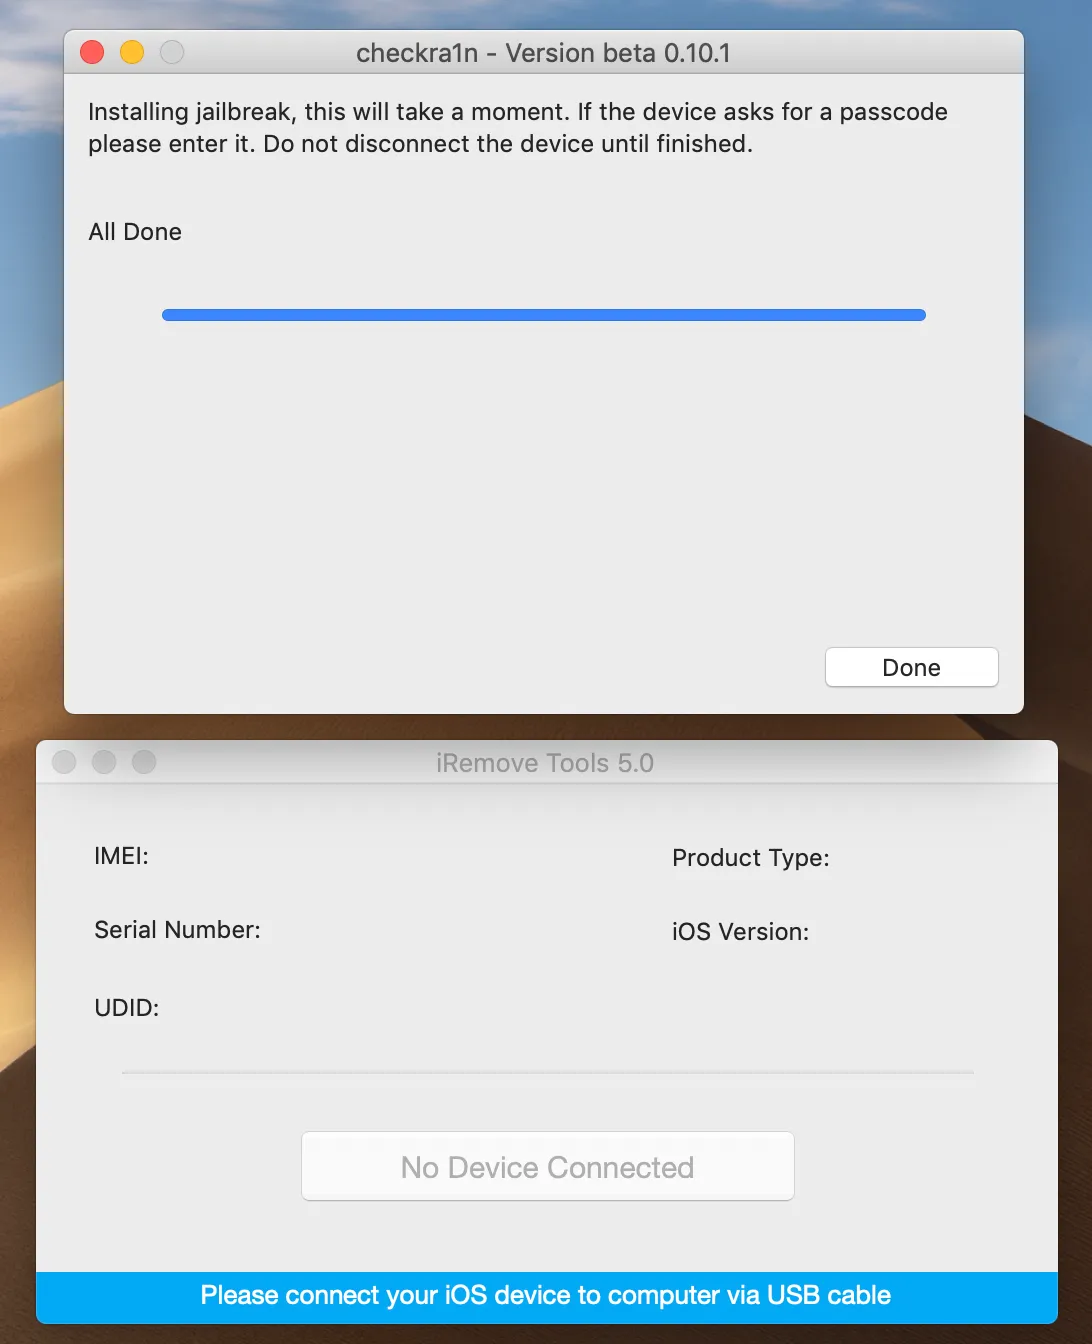
- The exploitation and jailbreaking processes will start once your device is in DFU mode. Verbose log of the jailbreaking process will be displayed on the device’s screen throughout entire jailbreaking process. DO NOT do anything with your mobile device and Mac PC. Just be patient and let them do what they do. In case jailbreaking processes is completed successfully, “All Done” message will appear. Please refer to common issues page if you receive error message.
- Checking if your device is ready:
![Checkra1n Jailbreak iOS via iRemove step 3]()
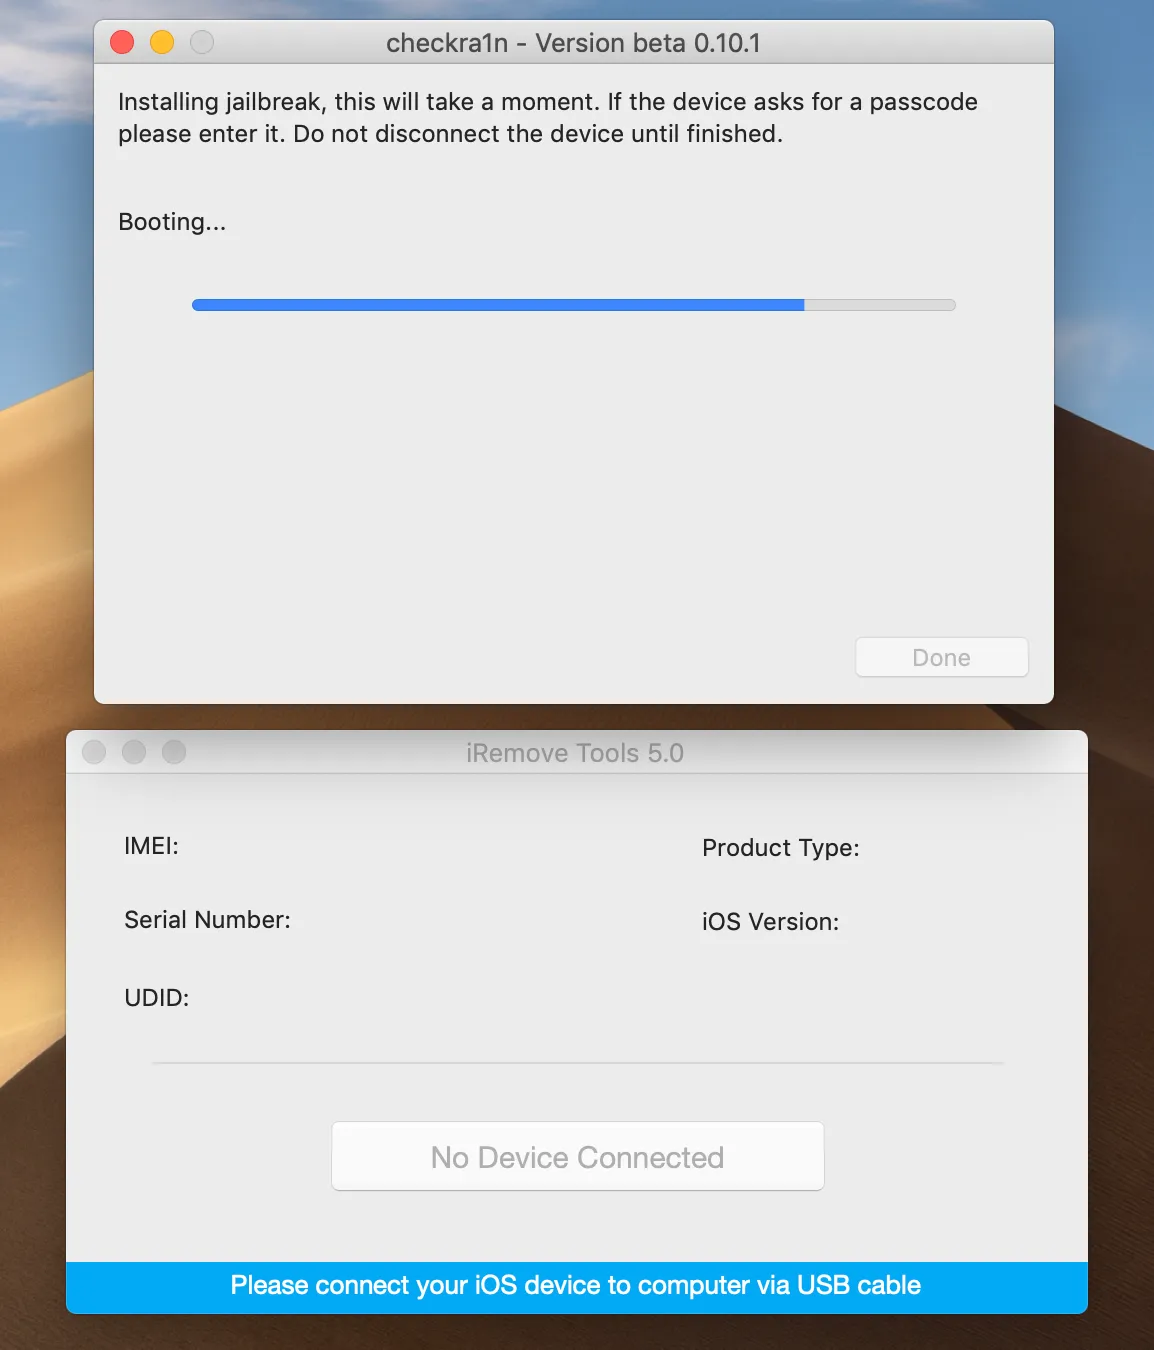
- Botting:
![Checkra1n Jailbreak iOS via iRemove step 4]()
- Jailbreaking process is completed:
![Checkra1n Jailbreak iOS via iRemove step 5]()
- Checking if your device is ready:
Share:
iPhone & iPad Unlock Software


Mac Unlock Software


![MacOS Remote Management [MDM] Bypass Software](/assets/img/banners/find-my-mac-unlock-without-icloud-password.svg)
iRemove News

USBLiter8 BootROM Exploit Explained | A12 & A13 Apple Devices
Learn how the USBLiter8 BootROM exploit works on Apple A12 and A13 devices. Explore SecureROM exploitation, Pwned DFU mode, supported devices, security implications, and research applications.
iCloud Unlock for iPhone 15 Series with iRemove Software
Unlock iCloud on iPhone 15 Series effortlessly with iRemove Software. Learn how to bypass Activation Lock on iPhone 15, 15 Plus, 15 Pro, and 15 Pro Max.
Bypass iCloud and Unlock iPhone 14 with the iRemove Software
Bypass the Activation Lock on any iCloud-locked iPhone 14 series model, including the 14 Plus, 14 Pro, and 14 Pro Max, using iRemove Software!
Bypass iCloud Lock from iPhone XR, XS, and XS Max
Use iRemove Software to Bypass iCloud Activation Lock on any iPhone XR, XS, and XS Max models. The fast and effective iCloud Unlock hardware method.

Bypass iCloud on iPhone 11 Series: 11, 11 Pro and 11 Pro Max
Bypass the iCloud Activation Lock on any iPhone 11 series model, including 11 Pro and 11 Pro Max, using the iRemove Activation Lock Bypass Tool!
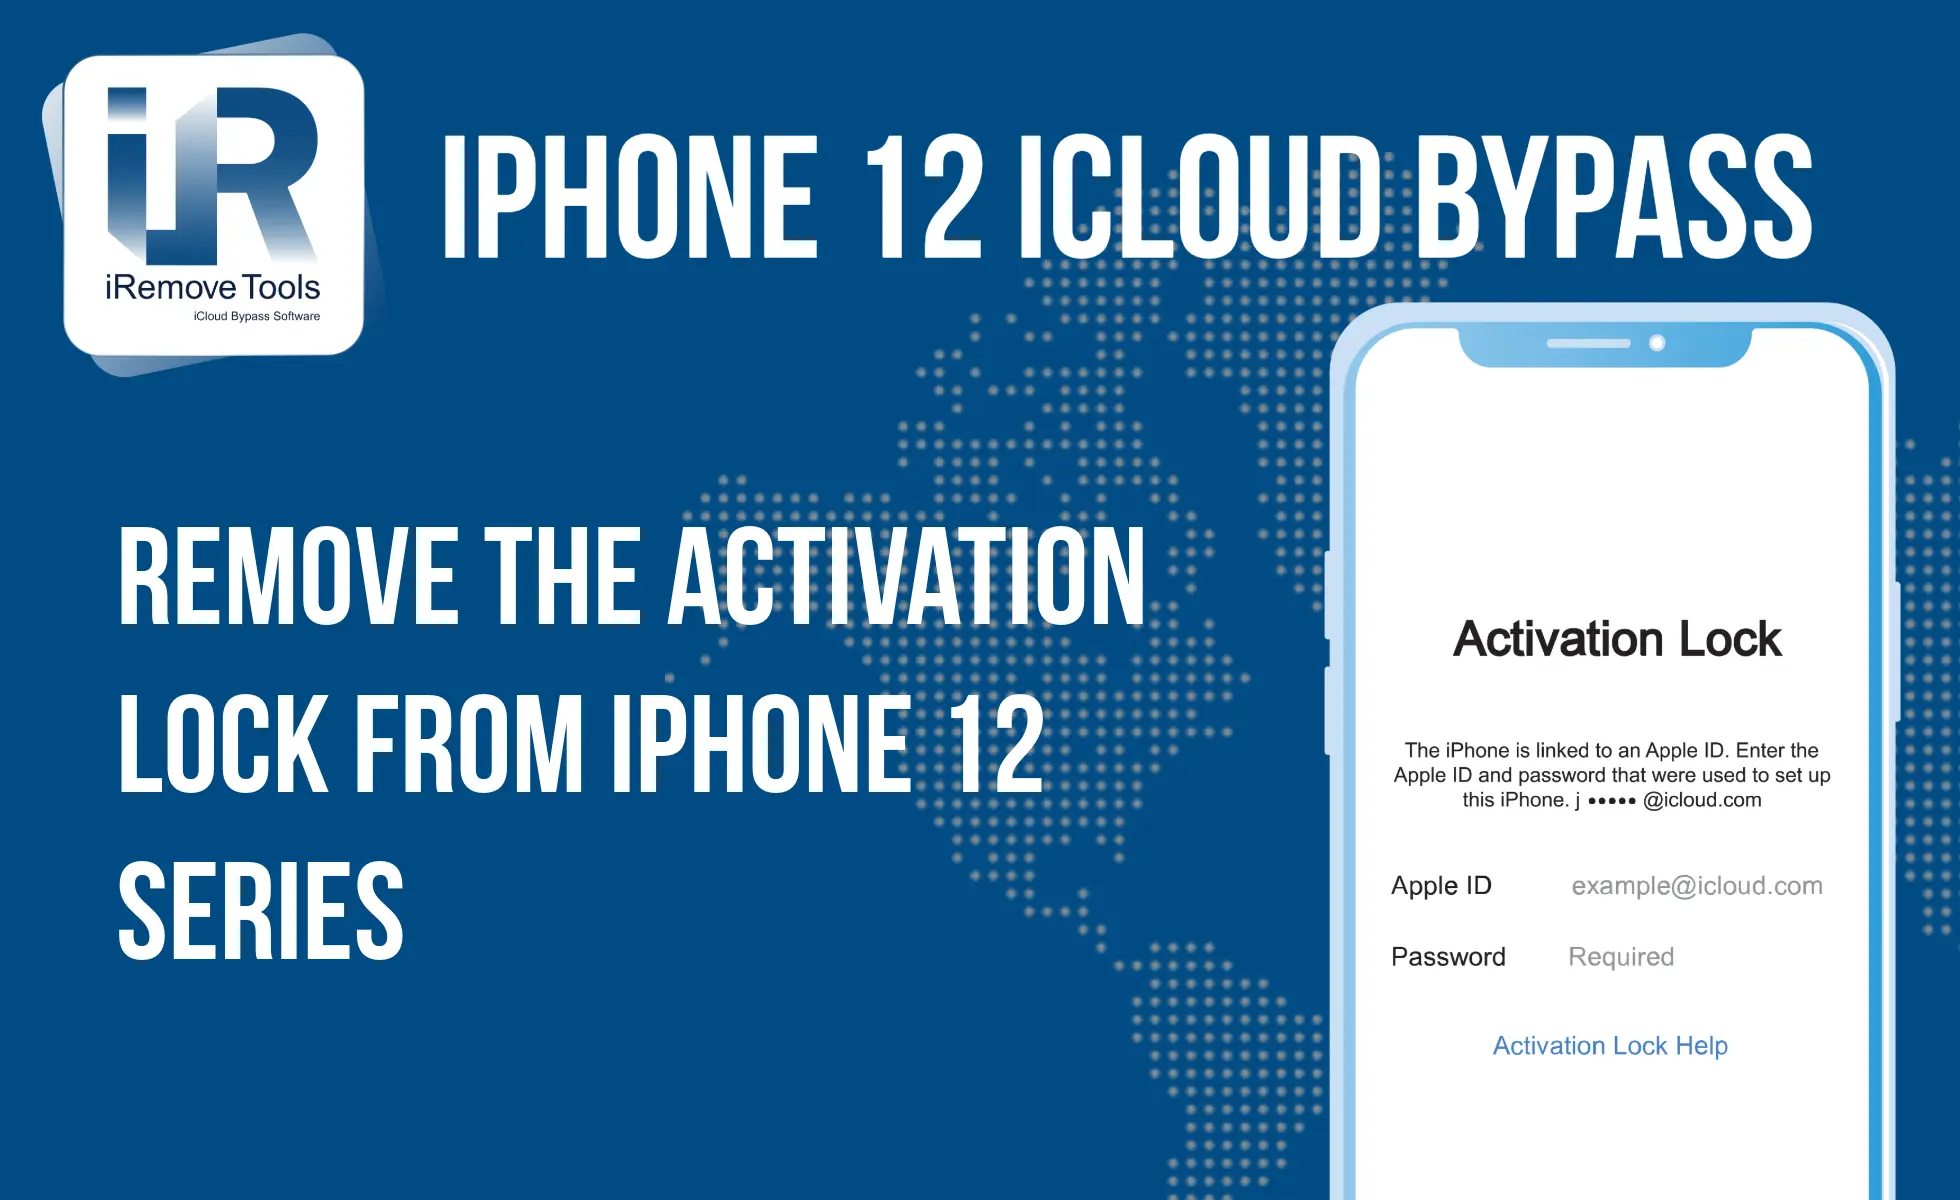
Remove - Bypass the Activation Lock on iPhone 12 Series
Unlock the Activation Lock on your iPhone 12, 12 Pro, 12 Pro Max, and 12 Mini quickly and easily with iRemove iCloud Bypass Software.
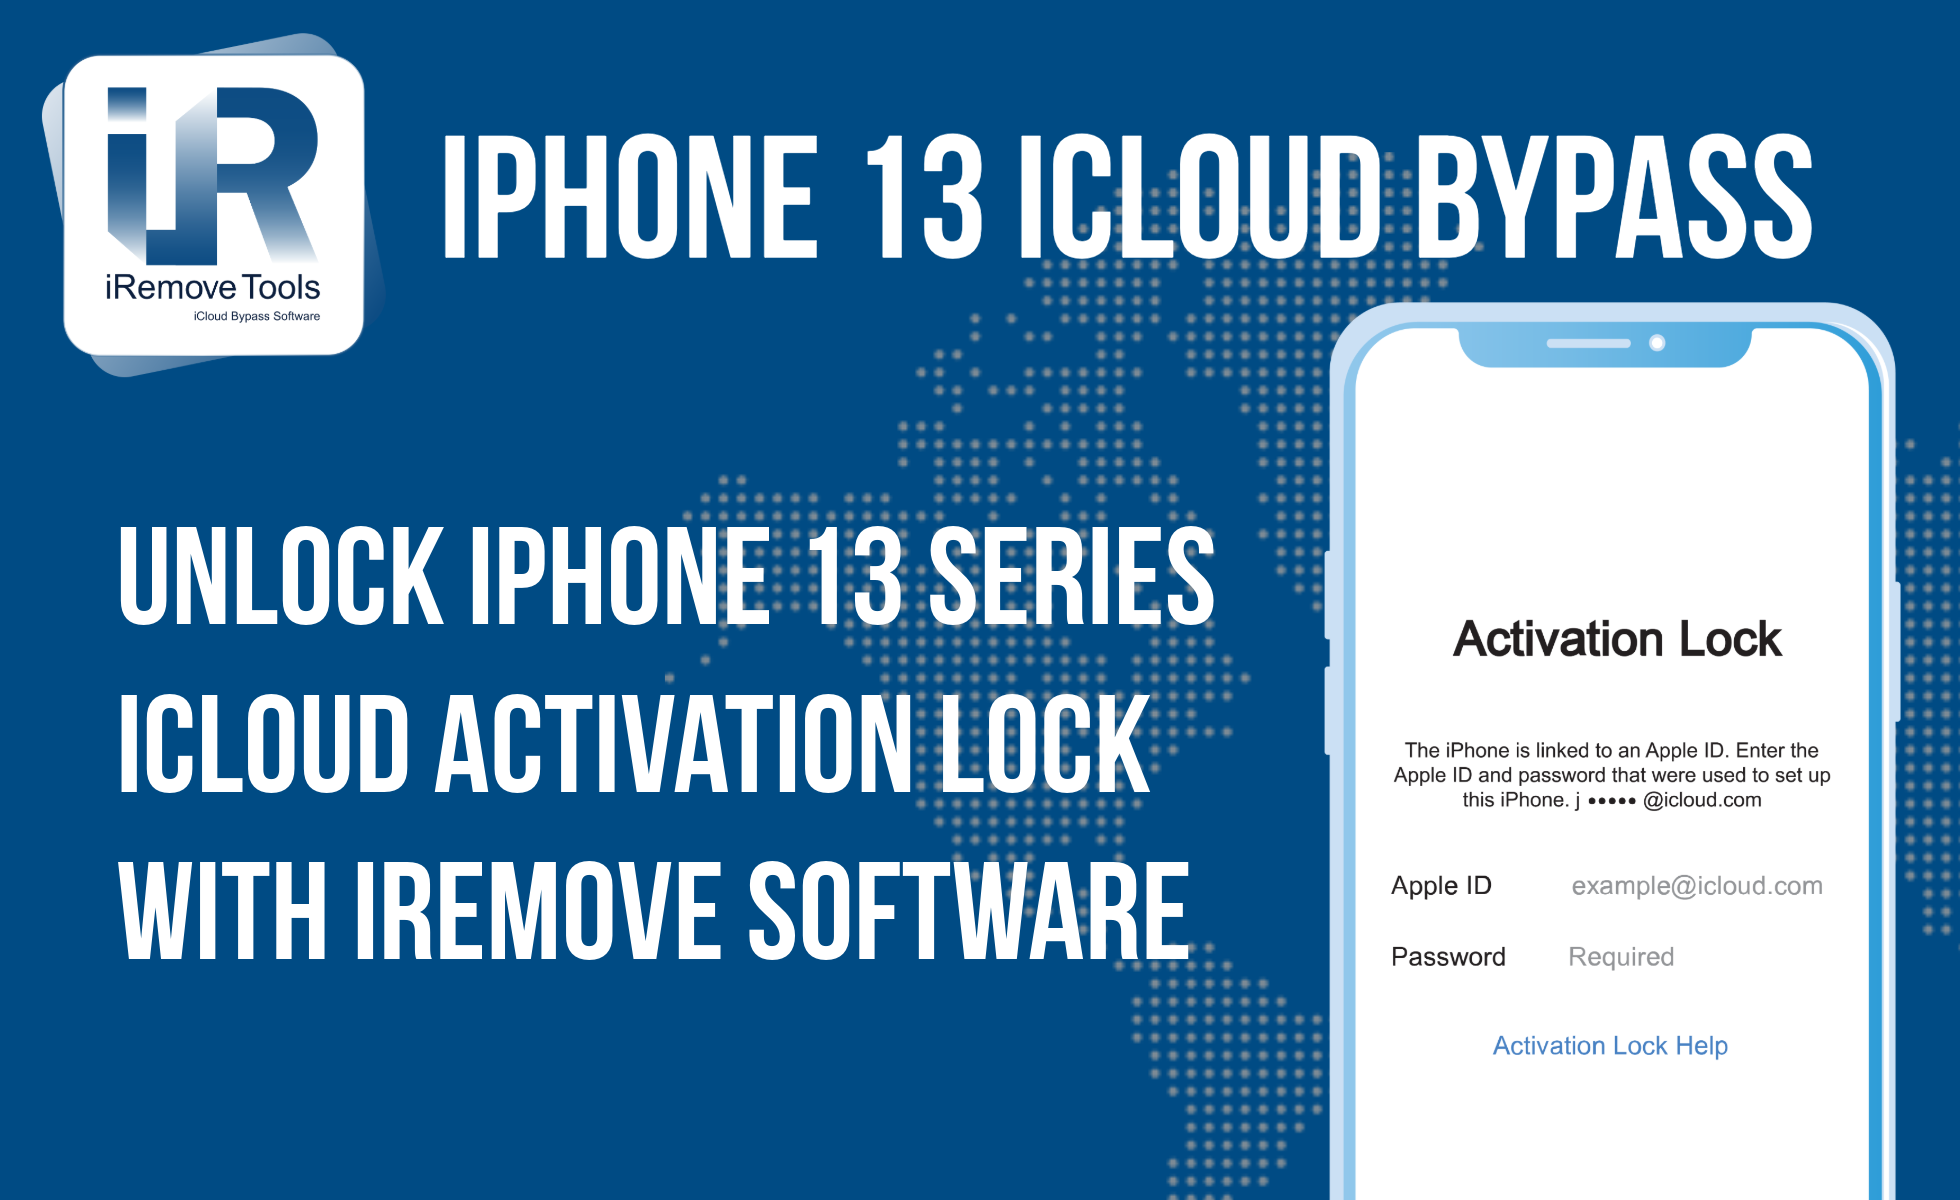
Unlock iPhone 13 with iRemove Software: Easy iCloud Bypass!
Learn how to bypass iCloud and remove Activation Lock from iPhone 13 series (13 Pro, 13 Pro Max) using iRemove Software. Guaranteed success in 2024!

Bypass iOS 16 iCloud Activation Lock Screen
Best iOS 16 iCloud Bypass solution for iPhone and iPad Devices with Activation Lock
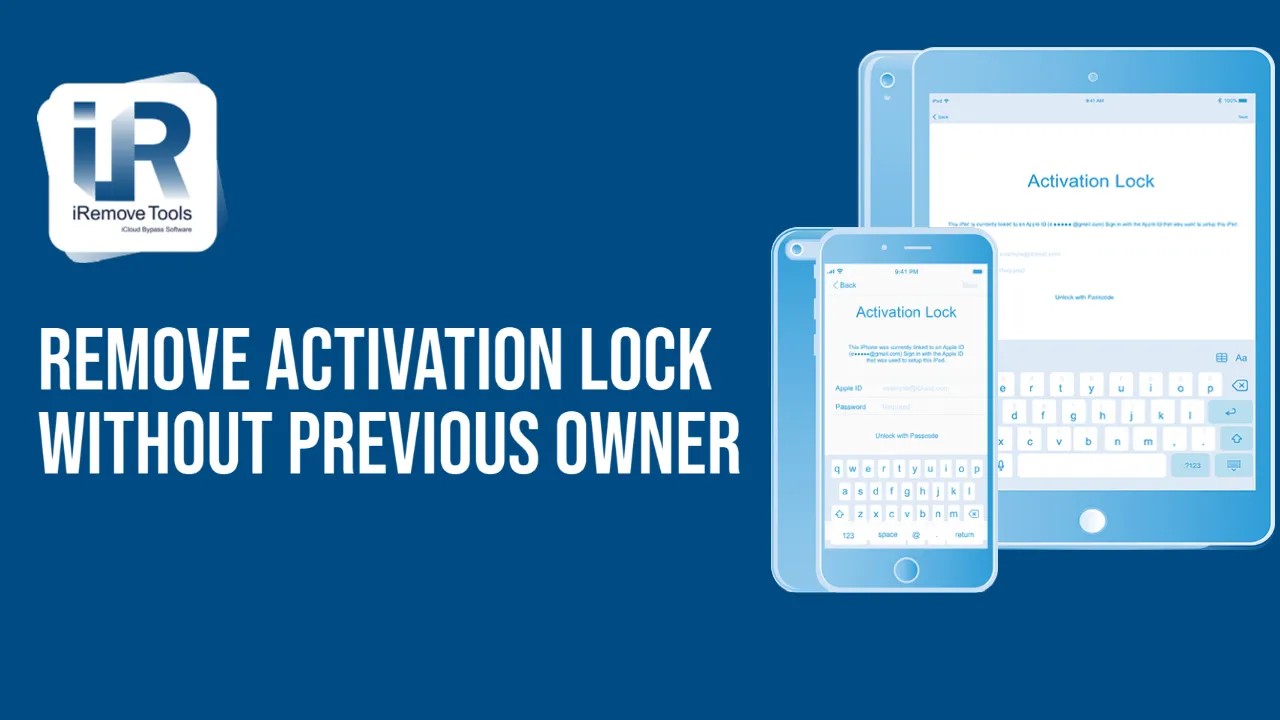
Remove Activation Lock without Previous Owner
All methods to ☆ REMOVE ACTIVATION LOCK WITHOUT PREVIOUS OWNER ☆ Ultimate how to guide for iPhone and other iOS users.

Bypass the Activation Lock on an iPad
Reliable Ways to Bypass the Activation Lock on an iPad without Apple ID Password and Previous Owner
Still looking for help?
Please don't worry. Please contact our support team. We are always happy to assist you.
Contact our friendly support team